Showing posts with label jewelry. Show all posts

Wednesday, August 29, 2012

Things I love lately

This e-card. It's a perfect description of my life.

Sharpie mugs. I want one way too much.

This quote. Hoping my sister in law is carrying a baby girl so I can craft with it. 
but I'll probably craft with it no matter what. 

This ring, I adore myself some peachy sapphires. Boys, take notes. 


Enjoy
xo rach


Wednesday, June 20, 2012

thrifty nifty wednesday: jacks to jewelry tutorial

I had a dress to share with you today for thrifty nifty wednesday,
but I thought I'd switch it up :)
I found these jacks this morning at the DI and they got my gears a turnin.

Things you'll need?
-Jacks
-Wire (I used 24 gauge wire)
-Pliers
-A necklace chain

1. Start by wrapping the wire around the middle of your jack.
2. Wrap the same piece of wire around an end that has a "ball" top,
and then wrap around the ball top of a different jack.


sorry! I got a bit ahead of my self... I then cut the wire and started the process over, 
but you could easily just keep the wire through out all.

3. After you've connected all your desired jacks together,
find the middle of your necklace and line up where you would like your jacks to hang.


5. After you have found where you want it to hang, find a whole in the chain that lines up with
end jacks, and middle jack. 


6. Feed the wire through the chain and wrap it around a ball top on the middle or side jacks
until the chain is tied up again the jack. 


7. Make sure all your wire is wrapped around the jack tight so it doesn't poke you.


8. Be super cutesy. 

I think you should know I'm now obsessed with wrapping things in wire for jewelry.
You can expect to see more. 
ENJOY

xo, rach


Tuesday, May 1, 2012

skirts and books.

I'm not a fashionista. not at all.
I could wear jeans and a vneck everyday and I would be content.
{I blame being the only girl of 4 brothers, and the daughter of an avid football fantasy mom}

But as I grow up, I realize that my wardrobe should too.
I've been purchasing dresses, skirts, and even wedges.
I occasionally feel odd, and uncomfortable in my far from regular attire.
but also more than occasionally I say "This is...better"
ex: this outfit, featuring my book necklace.

shirt: target, skirt: f21, shoes: payless, necklace: diy


OH OTHER BIG NEWS.
I realized after posting yesterday that I have reached 50 posts, and am 7 away from 2000 views.
I'm pretty excited, and pretty humbled. Thanks for reading!

Saturday, April 28, 2012

DIY: Book Stack Necklace

 DIY: BOOK STACK NECKLACE

I first saw it via anthropolgie. Then I saw it all over the interweb and I couldn't help but try and make one myself.

*side note: i'm still not great at diy's, sometimes I add in extra materials, lose materials, and forget to photograph along the way so bear with me :)

Materials:
-An old disposable book
-Super glue
-Three different colors of leather
-A necklace chain
-A necklace clasp
-Craft pliers
-Push pins
-A pointy thingy..(the one with the red handle, i found it in my daddy's tool box!)
-Scissors
-Tape


1. Cut your leather into rectangles (I used some leather cases for glasses I found at the D.I. at 75 cents each)

 If it has wierd fabric on a side, feel free to just pull it off :)

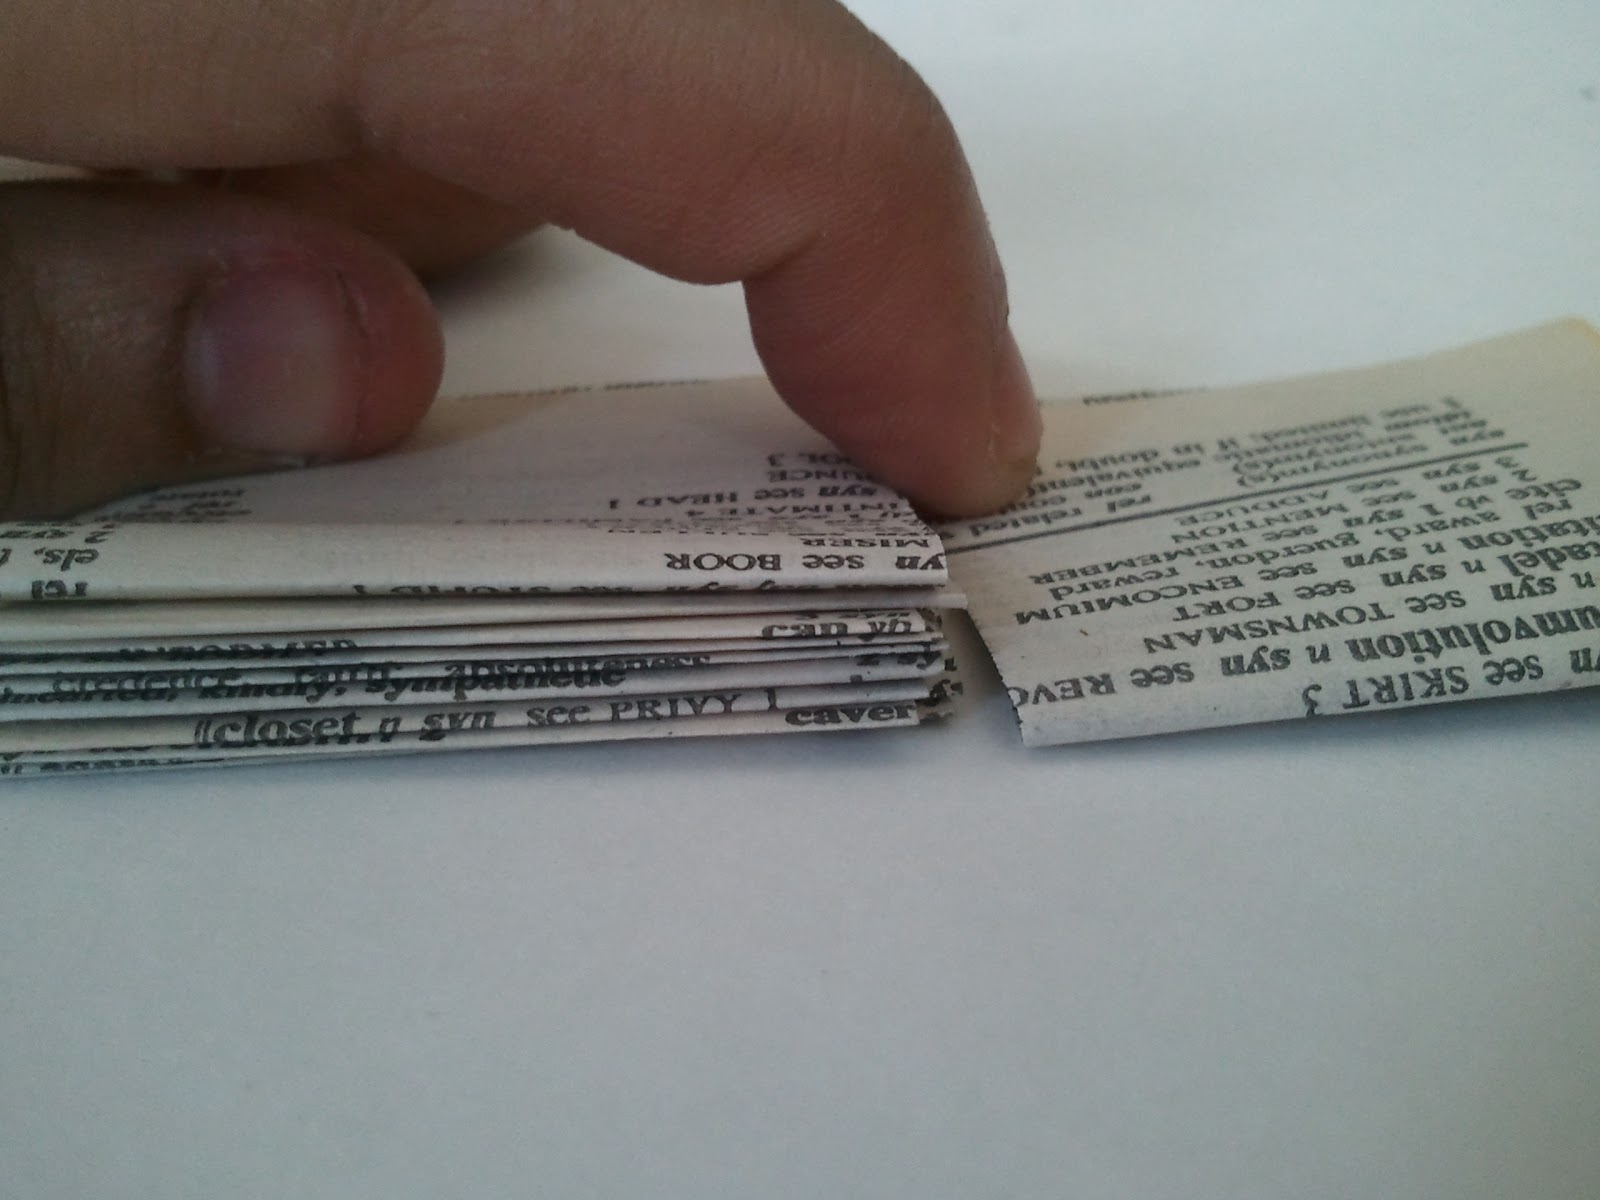
2. Measure your leather on the book pages and cut them out, then fold them in half. 


4. Layer your pages individually rather than one folded in another.


5. Bring all the pages to an even surface and then bind them with masking tape
(I used clear tape, and it doesn't stick to the super glue very well so i reccomend masking.)


 6. Put your super glue down on the leather and lay your pages on top and fold
( I also super glued some pages together, so it wasn't so open looking...)


 7. Let them dry underneath a heavy book, I used the host.  :)

 8. I left mine to sit for about 45 minutes, I then cut off the edges that were sticking out with scissors and an expo knife.

9. Poke through the leather and first couple of pages with a sharp pokey thing so your pin can have a place to start, then push the pin all the way through


10. This is where things get a bit crazy so bear with me. I bought some certain pin things to ultimitaley hold the books together, of course I couldn't find them anywhere. I used some extra earring hooks instead.
I simply flattened out a hook and guided it through the hole I made with the pin.
Sadly the hook was not long enough to go through all three books so I took my pliers and made my own loop from the bottom of the earring hook, and hooked it to the top of another earring hook...you got all that?


Then to hold it all in, i just bent the bottom of the second hook all crazy like. :)


11. In the midst of doing all that I attached my clasp and took of some of the chain off so it was the length that I wanted and then attached the books!
That step is as easy as prying open the chain links and closing them.
 AND DONE :) 
Don't mind my hair, I know its the craziest. 


 I hope you like, cause I sure do! I hope you got it all!

Wednesday, February 1, 2012

Bountiful Buttons Part 2


This is my version of Bountiful Buttons. (click here.)
I really am so excited about it, I'll probably wear it for 5 days straight, then 3 more days after that. 
It took me all afternoon. Seriously like 6 hours, but I'm more than happy with the outcome. 

Here's a DIY.
It's not very detailed and I apologize, but in my defense, it's my first. 


Items needed: 
-A chain: Walmart 3$
-Metal clasps: Walmart 2$ 
-Buttons (I used about 65): Planted Earth 18$ (An antique store in Orem, go it's addicting) 18$ sounds a bit pricy but considering the selection and style of vintage buttons, I think its worth especially compared to generic craft store buttons.
-Craft Tweezers: Hobby Lobby 5$
-Needle Nose Pliers: My daddy's tool box


( I recommend the Sea Life findings, they work like a dream, and come in 4 different sizes. They're handy)

1. I first aligned all my buttons along the chain.
So I could get an idea of where I where I wanted them and what the necklace to look like.


 2. Next I held the desired clasps with my craft tweezers and opened them up with the needle nose pliers and put on the button that I wanted. Then I thread the clasp through the necklace chain and squeeze it close with the pliers.


 3. Repeat for multiple hours until you love the look of your necklace :) 


Related Posts Plugin for WordPress, Blogger...